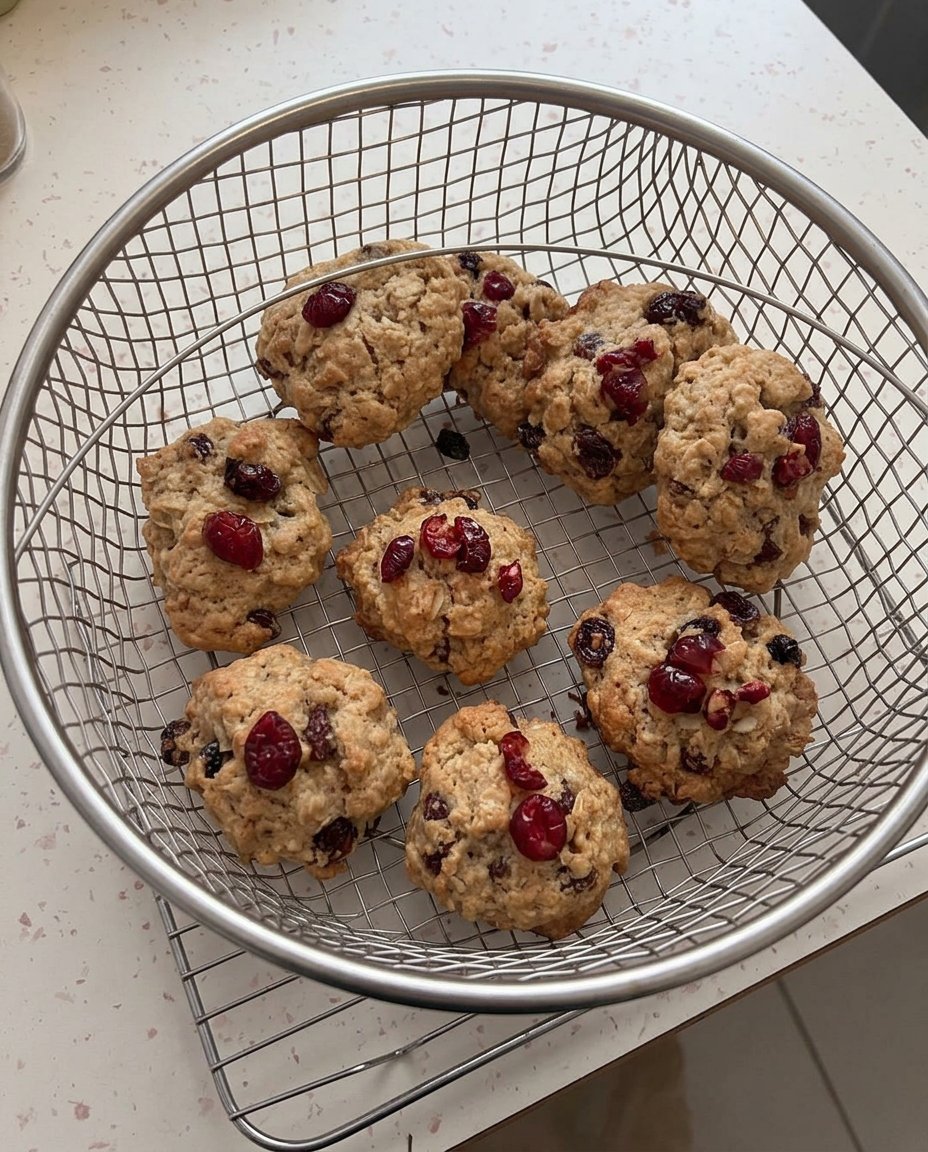
I remember the exact moment I decided to break the standard semi-sweet cookie rules. I was standing in my kitchen, staring at a massive bar of creamy milk chocolate, and I thought, “What if we just went all in on the sweetness?” Most people play it safe with dark chips, but I wanted a cookie that felt like a giant, warm hug from a childhood candy bar. These Milk Chocolate Chip Cookies are the result of that wild “more is more” epiphany, designed for those of us who believe that milk chocolate is the true king of the pantry.

We aren’t making those wimpy, thin little wafers you find in a grocery store sleeve. No way! We are crafting massive, 4-ounce monsters that take over the whole plate. These cookies are thick, gooey, and absolutely loaded with massive chunks of chocolate that ooze the second you break them open. If you are ready to ditch the boring and embrace the bold, this is the only recipe you will ever need to satisfy that deep, creamy chocolate craving.
Go Big Energy: Why You Will Obsess Over These
These are not your average treats; they are a full-blown experience for your taste buds! First off, we are talking about massive scale. Each cookie is a whopping four ounces of pure joy, giving you that NYC-style bakery vibe right in your own kitchen. The texture is where things get really wild. Thanks to a high-temperature bake at 395 degrees, we create a golden, crispy outer shell that locks in a center so soft and molten it practically melts on your tongue. It is the ultimate contrast that keeps you coming back for just one more bite.
Then there is the chocolate itself. While most recipes lean on semi-sweet to balance the sugar, we are doubling down on the decadence of milk chocolate. It is smoother, creamier, and brings a nostalgic sweetness that pairs perfectly with the hits of Maldon sea salt we sprinkle on top. This recipe is for the rule-breakers who want their Milk Chocolate Chip Cookies to be the star of the show. It is bold, it is unapologetic, and it is designed to turn any ordinary Tuesday into a legendary cookie party. You are going to love the way the chocolate chunks create little pools of liquid gold inside the dough.
Print
Milk Chocolate Chip Cookies
- Total Time: 25 mins
- Yield: 12 large cookies
- Diet: Vegetarian
Description
These massive, NYC-style cookies feature a perfectly golden, crispy exterior and a molten, gooey center. Loaded with thick chunks of creamy milk chocolate and finished with a touch of flaky sea salt, they are the ultimate treat for those who believe more is always more.
Ingredients
- 1 cup cold cubed butter
- 3/4 cup brown sugar
- 1/2 cup white sugar
- 2 large eggs
- 1 tablespoon vanilla extract
- 1 1/2 cups all-purpose flour
- 1 1/2 cups cake flour
- 1 teaspoon cornstarch
- 3/4 teaspoon baking soda
- 1/2 teaspoon salt
- 2 cups milk chocolate chips and chunks
- Maldon sea salt flakes for topping
Instructions
- Preheat your oven to 395°F and line light-colored baking sheets with parchment paper.
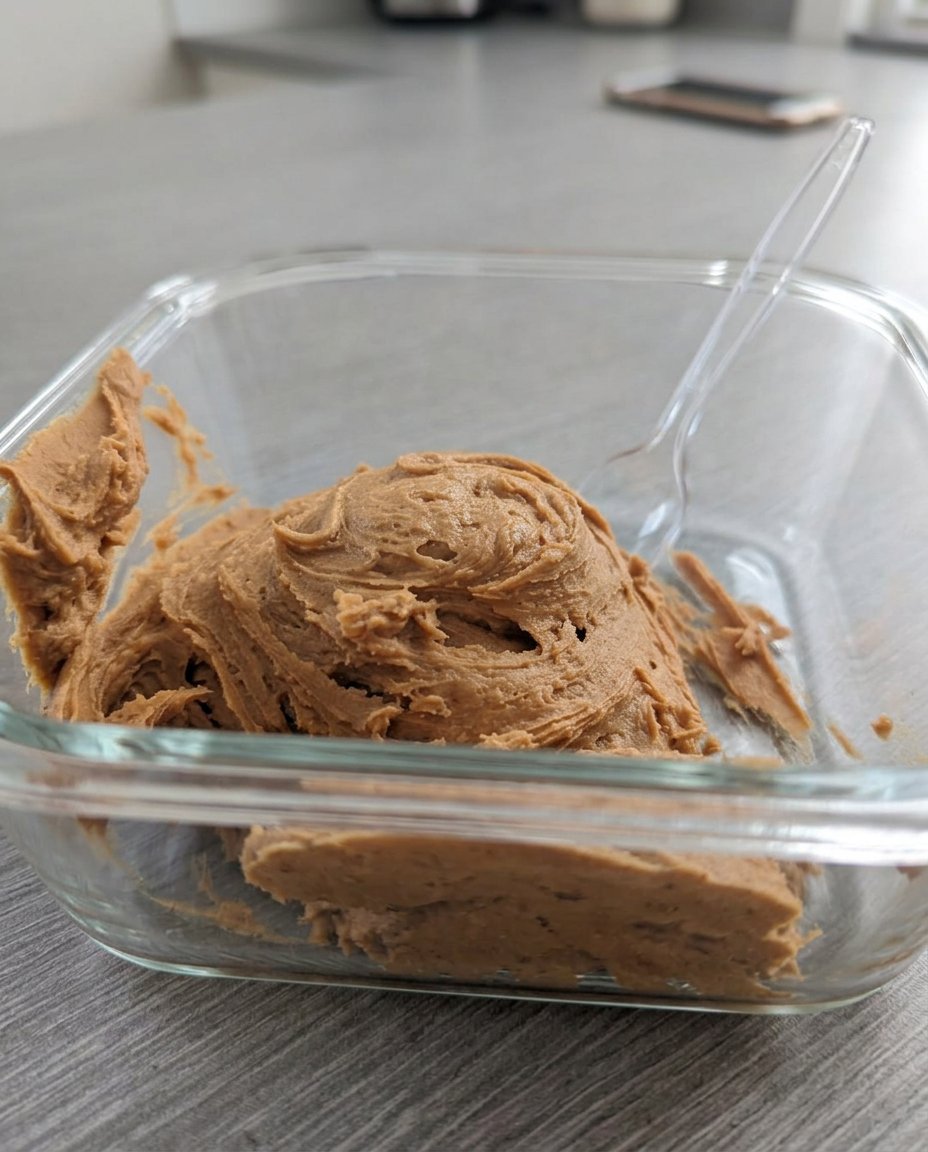
- In a stand mixer, cream together the cold cubed butter, brown sugar, and white sugar for 3 to 4 minutes until light and fluffy, scraping down the sides as needed.
- Mix in the eggs and vanilla extract for approximately one minute until the mixture is smooth and pale gold.
- Switch to low speed and fold in the all-purpose flour, cake flour, cornstarch, baking soda, and salt just until no white streaks remain.
- Hand-fold in the milk chocolate chips and chunks until evenly distributed.
- Roll the dough into large 4-ounce balls and place them on the prepared baking sheets with plenty of space between them.
- Bake for 9 to 11 minutes until the edges are lightly golden but the tops still appear soft.
- Remove from the oven, immediately sprinkle with Maldon sea salt, and let rest on the pan for 10 minutes to set.
Notes
Using cold butter instead of softened is the secret to achieving that signature thick, bakery-style height without the dough spreading too thin. For the best results, use a high-quality milk chocolate bar and chop it by hand to create varied textures and pools of chocolate in every bite.
- Prep Time: 15 mins
- Cook Time: 10 mins
- Category: Dessert
- Method: Baking
- Cuisine: American
The Candy Arsenal: What You Need for Greatness

To build these heavyweights, you need ingredients that can stand up to the heat and the size. We are not cutting corners here, because more is always more! Every single item on this list plays a vital role in creating that thick, gooey structure we crave.
- Cold Cubed Butter: Forget softened butter. We use cold cubes to keep the dough from spreading too much, which helps create those tall, thick mountains of cookie goodness.
- The Sugar Duo: We use a mix of brown sugar for that deep, chewy molasses flavor and white sugar for those perfectly crisp, golden edges.
- The Flour Power Blend: We use a combination of all-purpose flour and cake flour. The cake flour is the secret weapon that keeps these cookies tender and soft instead of tough and bready.
- Cornstarch: This is my favorite little trick. It adds a bit of lift and keeps the center of the cookie extra soft for days.
- Two Cups of Milk Chocolate: We are using a mix of chips and hand-cut chunks. This gives you different textures of chocolate in every single bite. I love using high-quality brands like Guittard or even a chopped-up Pound Plus bar from Trader Joe’s.
- Maldon Sea Salt Flakes: This is optional but highly recommended. That little pop of salt cuts through the sweetness of the milk chocolate and makes every flavor explode.
Don’t be afraid to get messy with your mix-ins! When you are folding in that chocolate, you want it to feel like there is almost more candy than dough. That is the Riley Thomas Swanston way!
How to Build the Ultimate Monster Cookie
Step 1: Crank Up the Heat
Start by preheating your oven to a roaring 395 degrees Fahrenheit. This high heat is the secret to getting that instant rise and the beautiful golden crust while keeping the inside gooey. Line your light-colored baking sheets with parchment paper so nothing sticks to the pan.
Step 2: The Creaming Phase
In your stand mixer, toss in that cold, cubed butter along with the brown sugar and white sugar. Cream them together for a full 3 to 4 minutes. You want it to look light and fluffy. Don’t forget to stop and scrape down the sides of the bowl halfway through to make sure every bit of butter is getting cozy with the sugar.
Step 3: Add the Flavor Base
Drop in your two large eggs and the vanilla extract. Mix it for about one more minute. You will see the mixture start to look like a smooth, pale gold cream. This is where all that rich flavor begins to take shape.
Step 4: Fold in the Dry Goods
It is time for the flour power! Add your all-purpose flour, cake flour, cornstarch, baking soda, and salt. Switch to a low speed or use a spatula to fold everything together. Stop the second you don’t see any more white streaks. We want tender cookies, and over-mixing is the enemy of tender!
Step 5: The Chocolate Avalanche
Now for the best part! Pour in those two cups of milk chocolate chips and chunks. Use your spatula to fold them in by hand. You want those chocolate pieces distributed everywhere so that no bite is left behind without a massive hit of milk chocolate.
Step 6: Go Big on the Scoops
Grab your scale or a large scoop and roll the dough into massive 4-ounce balls. They should look like little boulders! If you want them to look like they came from a fancy bakery, press a few extra chocolate chips right onto the top of each ball before they go into the oven.
Step 7: The Hot Bake
Space your dough balls out on the baking sheet—they need room to breathe! Bake for 9 to 11 minutes. Keep a close eye on them; you are looking for those edges to just barely turn a light golden brown while the tops still look a little soft. They will finish setting up on the hot pan.
Step 8: The Salty Finish
Pull them out of the oven and immediately give them a light sprinkle of Maldon sea salt flakes. Let them sit on the baking sheet for at least 10 minutes. This wait is the hardest part, but it lets the structure set so you don’t end up with a pile of crumbs!
Riley’s Wild Tips for Cookie Perfection

If you really want to win the cookie game, listen up! One of my favorite moves is the “pan bang.” About halfway through the bake, I lift the baking sheet and gently drop it against the oven rack. This creates those beautiful ripples and helps the chocolate settle into pools. Also, if you have the patience, chilling the dough for 24 hours makes a massive difference in the depth of flavor. If you choose to go that route, check out my guide on no-chill chocolate chip cookies to see how the timing changes the final result. For the best visual drama, always use a mix of chips and chopped chocolate bars; the different melting points create a much more interesting texture. You can find more inspiration for this style over at Modern Honey where they share similar high-heat techniques.
Mashup Ideas: Go Even Bigger
Who says you have to stop at milk chocolate? If you want to turn these into a true “Kitchen Sink” situation, try adding half a cup of crushed pretzels for a salty crunch that will blow your mind. You could also swap out half the milk chocolate for peanut butter chips to create a classic flavor combo. If you are feeling extra adventurous, stuff a whole Oreo or a mini Reese’s cup inside the 4-ounce ball before baking. For more ideas on how to achieve that professional look, my bakery-style chocolate chip cookies post covers all the different mix-ins you can use to make your cookies stand out at any party.
Party Mode: How to Serve the Goods

These cookies are meant to be shared! I love serving them warm on a large wooden board so everyone can just grab one and see the chocolate ooze. If you want to go the extra mile, serve them alongside a cold glass of whole milk or even a small scoop of vanilla bean ice cream for the ultimate sundae vibe. For those who love a variety, I suggest making a platter with these and some of my bakery-style chocolate chip cookies to give your guests a choice between different chocolate intensities. They are always the first things to disappear at any gathering!
Cookie Chaos: The Sweet Truth
At the end of the day, baking should be about having fun and making something that makes people say “WOW.” These cookies are my go-to when I want to impress because they are loud, proud, and unapologetically sweet. Don’t be afraid to experiment with the sizes or the types of chocolate you use—rules are meant to be broken in my kitchen! If you loved these, you should definitely try my chocolate no-bake cookies for those days when it is just too hot to turn on the oven. Make sure to share your monster creations with me on Instagram, Pinterest, Facebook, and TikTok! I can’t wait to see your epic cookie stacks!
