I remember walking through the farmers market last autumn and seeing jars of deep, golden honey that reminded me of the sun setting over the fields. It inspired me to create something that captured that rich, amber glow inside a deep chocolate embrace. These thumbprints are the result of that search for natural, golden beauty, blending cocoa with a heart of homemade sweetness.

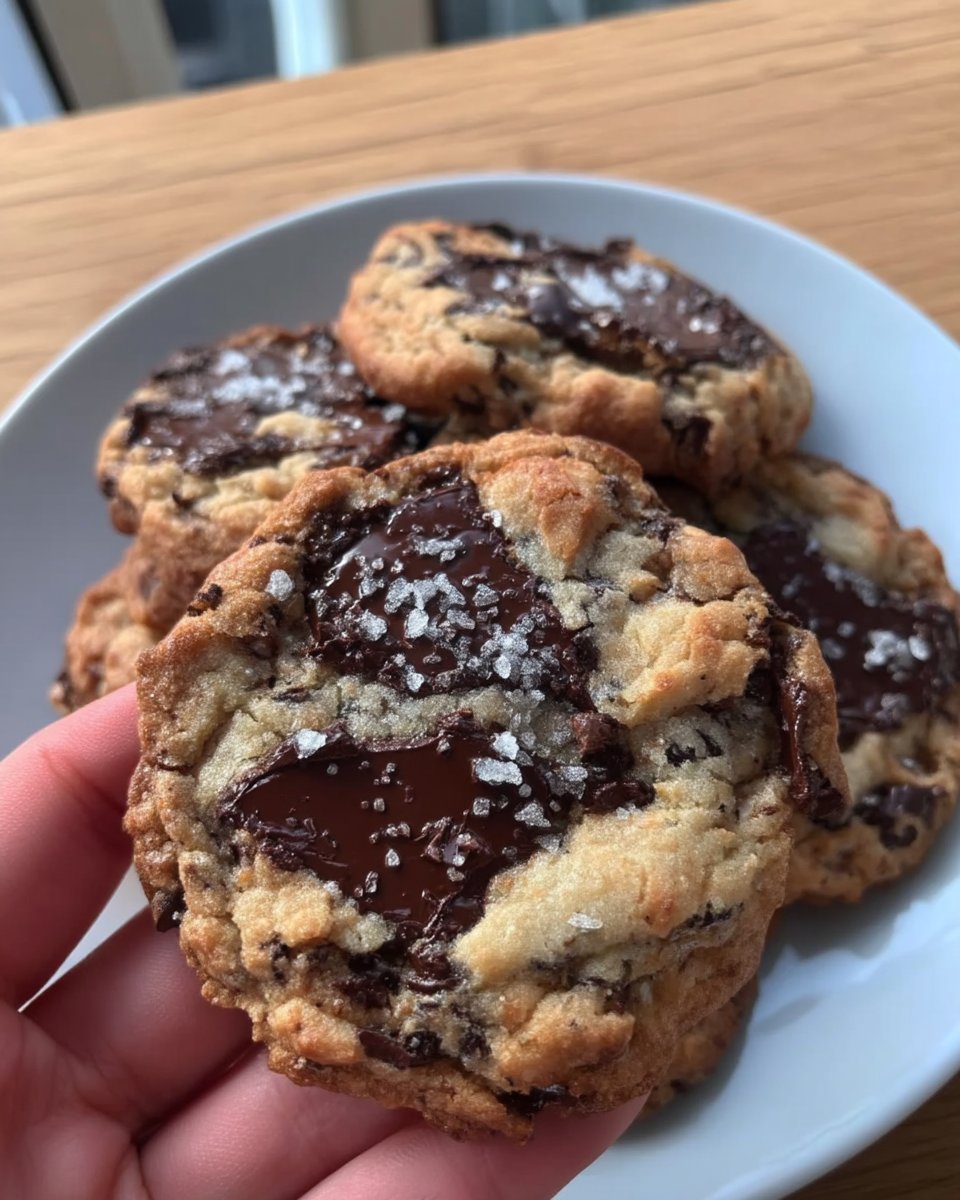
These cookies are a celebration of contrasting textures and flavors, combining a soft cocoa base with a pool of buttery homemade caramel. Every bite is a balance of dark, earthy chocolate and the bright sweetness of sugar cooked to a perfect amber hue. They look like little gems from a forest treasure hunt, perfect for sharing on a quiet afternoon.
A Wholesome Touch of Golden Bliss
There is something truly special about a cookie that you shape by hand. These Caramel Thumbprint treats are more than just a sweet snack; they are a labor of love that highlights the beauty of real ingredients. We are packing these with deep cocoa and a caramel sauce made from scratch, proving that you do not need artificial syrups to get that perfect, gooey center. The sprinkle of flaky sea salt on top brings out the richness of the chocolate and the warmth of the butter, making every mouthful feel like a small gift from nature.
Print
Caramel Thumbprint
- Total Time: 1 hour 50 mins
- Yield: 24 cookies
- Diet: Vegetarian
Description
These exquisite chocolate thumbprint cookies feature a soft, cocoa-infused base filled with a rich, handcrafted amber caramel. A delicate finish of flaky sea salt elevates the deep chocolate flavors and buttery sweetness for a sophisticated holiday treat.
Ingredients
- 1 cup (227g) unsalted butter, softened
- 3/4 cup (150g) granulated sugar (for dough)
- 1 cup (201g) granulated sugar (for caramel)
- 1 room temperature egg
- 2 teaspoons vanilla extract (for dough)
- 1 teaspoon vanilla extract (for caramel)
- 2 cups (250g) all-purpose flour
- 3/4 cup (94g) unsweetened cocoa powder
- 1/2 teaspoon baking powder
- 1/4 teaspoon salt
- 3/4 cup (6 ounces) heavy cream, room temperature
- Flaky sea salt for garnish
Instructions
- In a large bowl, cream together the softened butter and 3/4 cup sugar for five minutes until light and fluffy.
- Beat in the room temperature egg and 2 teaspoons of vanilla extract until well combined.
- Sift together the flour, cocoa powder, baking powder, and salt, then gradually mix into the butter mixture until a soft dough forms.
- Roll the dough into tablespoon-sized balls and use a thumb or spoon to press a deep well into the center of each.
- Place the cookies on a baking sheet and refrigerate for one hour to maintain their shape.
- Preheat the oven to 350°F (175°C) and bake for 10-12 minutes; use a spoon to gently re-press the indentations while the cookies are still warm.
- In a heavy-bottomed pot, heat the remaining sugar and a splash of water over medium heat until it reaches a deep amber color, then whisk in the cream, butter, and remaining vanilla.
- Allow the caramel to cool and thicken, then spoon it into the centers of the cooled cookies and garnish with flaky sea salt.
Notes
To achieve a perfectly smooth caramel, avoid stirring the melting sugar and instead gently swirl the pan to ensure even coloring. If the caramel centers become too firm after setting, you can briefly warm the cookies for a few seconds before serving to restore the gooey texture.
- Prep Time: 20 mins
- Cook Time: 30 mins
- Category: Dessert
- Method: Baking
- Cuisine: American
Natural Ingredients for a Richer Treat

To create these beautiful cookies, we start with high-quality staples that you likely already have in your farmhouse pantry. Using room temperature ingredients makes the dough come together with a soft, pliable texture that is easy to shape.
- Unsalted Butter: 1 cup (227g), softened to room temperature for that perfect creaminess.
- Granulated Sugar: 3/4 cup (150g) for the cookie base and an additional 1 cup (201g) for the golden caramel.
- Room Temperature Egg: This helps the dough bind together without becoming tough.
- Real Vanilla Extract: 2 teaspoons for the dough and 1 teaspoon for the caramel to add a warm, floral depth.
- All-Purpose Flour: 2 cups (250g) provides the sturdy structure needed for the thumbprint indent.
- Cocoa Powder: 3/4 cup (94g) of unsweetened cocoa gives that earthy, dark color.
- Heavy Cream: 3/4 cup (6 ounces) at room temperature to turn melted sugar into a silky sauce.
- Flaky Sea Salt: A tiny pinch for the garnish makes the flavors sing.
The Natural Process of Baking
Step 1: Cream the Butter and Sugar
Start by creaming together your softened butter and granulated sugar in a large bowl. You want to mix this for about five minutes until the texture is light, fluffy, and looks like a pale cloud. This step is vital for a soft cookie that melts in your mouth.
Step 2: Add the Wet Ingredients
Add in your room temperature egg and mix it thoroughly into the butter mixture. Once combined, stir in the vanilla extract. The scent of vanilla always makes my kitchen feel like the heart of the home.
Step 3: Mix the Dry Ingredients
In a separate bowl, sift together your flour, cocoa powder, baking powder, and salt. Sifting is a great way to remove any lumps from the cocoa. Add the dry ingredients to your wet mixture in three parts, mixing gently between each addition until a soft, chocolatey dough forms.
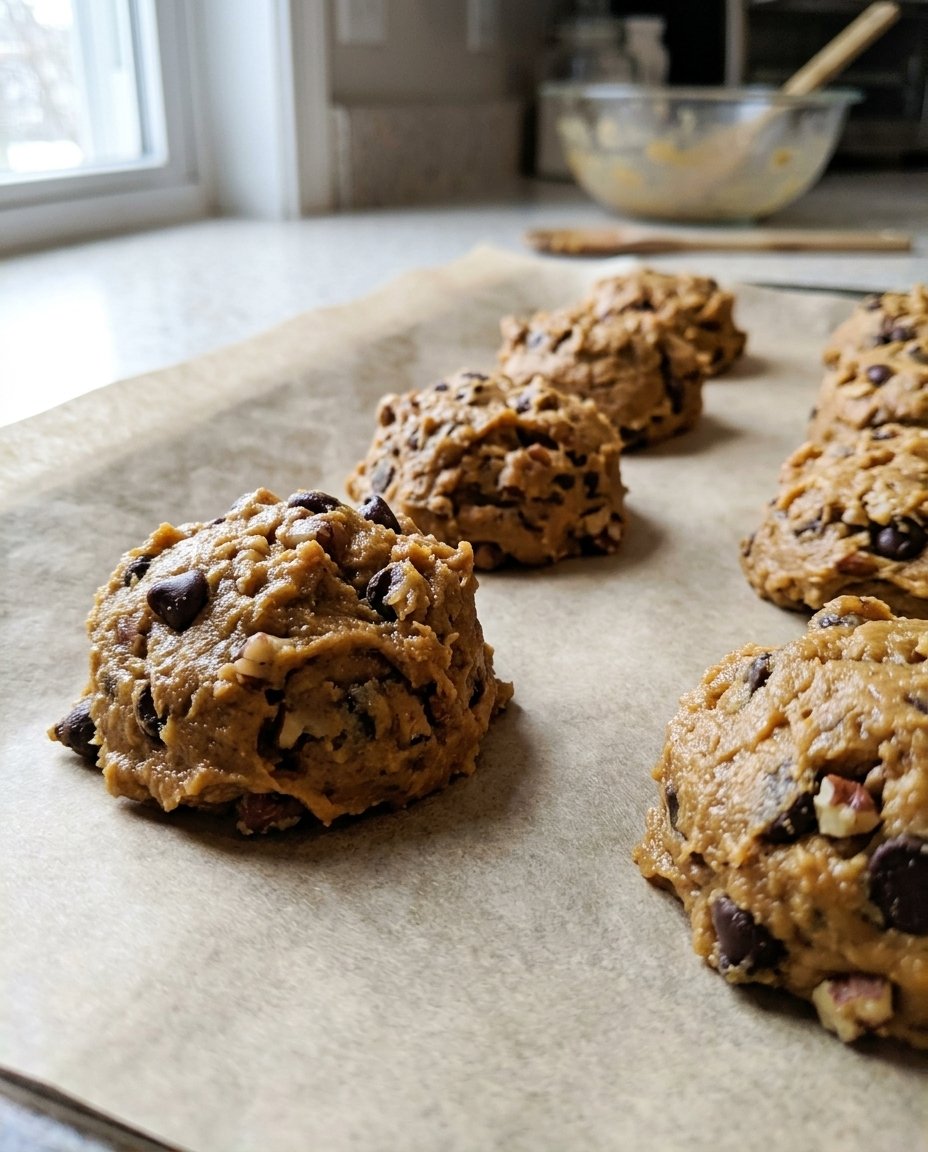
Step 4: Shape and Chill
Roll the dough into balls about the size of a tablespoon (roughly 1 ounce each). Use your thumb or a small measuring spoon to press a deep well into the center of each ball. Place them on a baking sheet and let them rest in the refrigerator for one hour. Chilling helps the cookies keep their beautiful shape in the oven.
Step 5: Bake and Indent
Preheat your oven to 350°F (175°C). Bake the cookies for 10 to 12 minutes. As they bake, the centers might puff up slightly. As soon as you take them out of the oven, use your spoon to gently press those centers down again while they are still soft. Let them cool completely.
Step 6: Create the Amber Caramel
In a heavy-bottomed pot, combine sugar and water over medium heat. Let it sit and bubble without stirring for 10 to 15 minutes. Watch it closely until it turns a beautiful amber color. Remove from heat and carefully whisk in the cream, butter, and vanilla. It will bubble up, so be careful. Let the sauce cool until it thickens.
Step 7: Fill and Garnish
Spoon about a teaspoon of the cooled caramel into the center of each chocolate cookie. Finish with a small sprinkle of flaky sea salt to highlight that natural sweetness.
Christine’s Secrets for Fresh Wisdom

When making your caramel, please resist the urge to stir the sugar as it melts. Stirring can cause the sugar to crystallize, making the sauce grainy instead of smooth. Just keep a watchful eye on the color; you are looking for a deep amber that smells like toasted nuts. If you find your cookies are spreading too much, make sure your dough is truly cold before it hits the oven. For another take on rich, buttery flavors, you might also like to try my brown-butter-toffee-cookies. Also, checking out these chocolate-thumbprint-cookies can give you even more inspiration for different filling techniques.
Seasonal Swaps and Natural Options
You can easily adapt this Caramel Thumbprint recipe to match what is growing in your garden or available at the market. Instead of caramel, try filling the centers with a thick raspberry jam for a burst of seasonal color. If you want more crunch, roll the dough balls in chopped pecans or walnuts before making the thumbprint indent. For those who love a cozy, rustic treat, my oatmeal-scotchies offer a different way to enjoy those warm butterscotch notes.
Natural Presentation and Fresh Enjoyment

These cookies look stunning when served on a simple wooden board or a ceramic platter. They are the perfect companion for a cup of herbal tea or a cold glass of farm-fresh milk. If you are hosting a gathering, try serving them alongside some scottish-shortbread for a beautiful variety of textures that your guests will love. They also make a lovely gift when tucked into a brown paper box tied with a bit of natural twine.
Abundant Baking from My Kitchen
I hope these Caramel Thumbprint cookies bring a little bit of natural beauty to your home today. There is such joy in creating something from scratch and watching simple ingredients like sugar and cream transform into something golden and delicious. If you enjoyed this recipe, you might find my peanut-butter-blossom-cookies to be another fun way to play with shaped dough. Please share your baking photos with me on Pinterest, Instagram, or Facebook. Happy baking!

