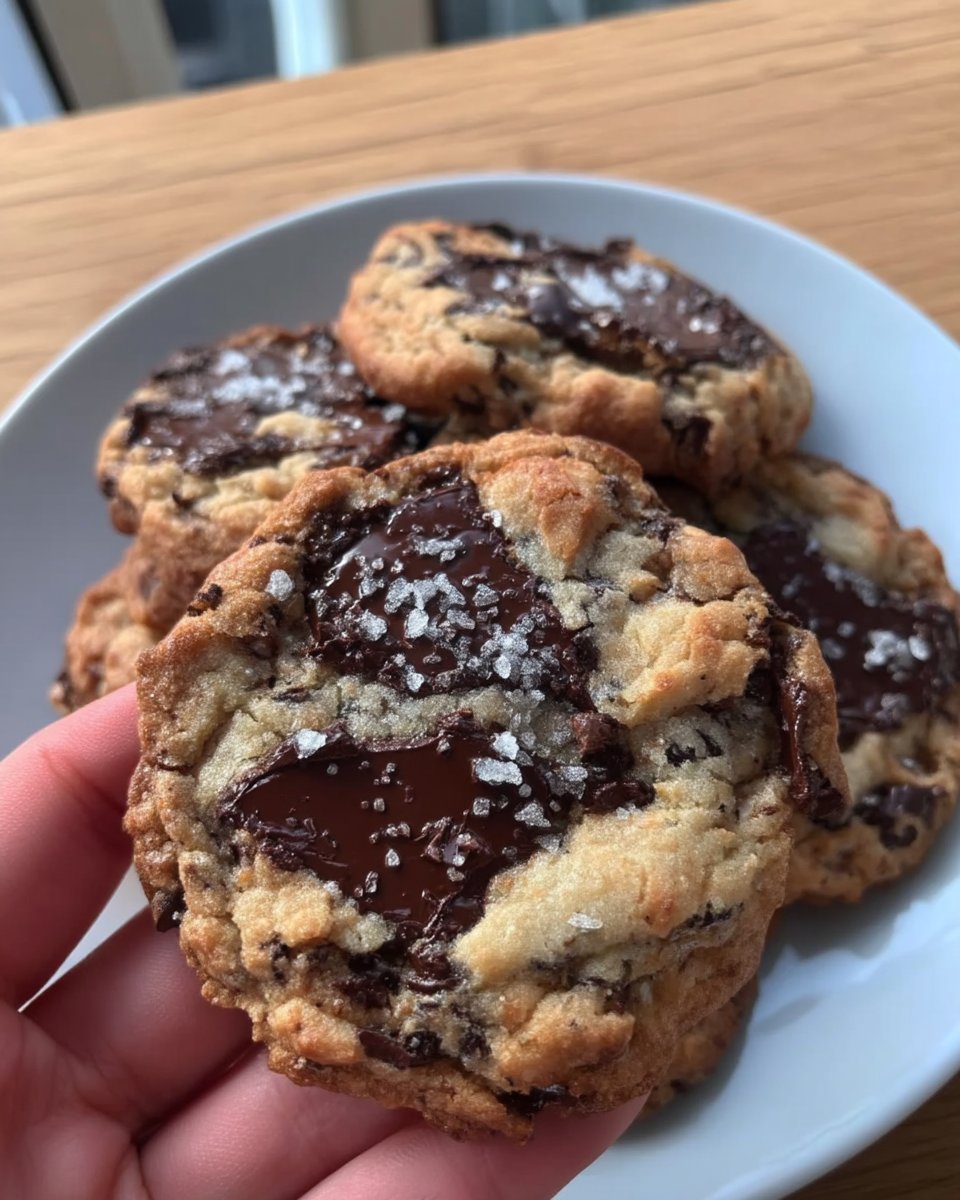
In my grandmother’s kitchen, we always spoke about the heart of the home being the oven, but I believe it is actually the dough. A cookie’s success is not determined by how many toppings you throw on top, but by the strength and flavor of its foundation. These Bakery Style Chocolate Chip Cookies 3 represent everything I believe in: a reliable, buttery base that stands up to the tallest glass of milk and the wildest imaginations.

This particular recipe is a celebration of classic technique, using a specific blend of flours and a patient chilling process to achieve that iconic bakery texture. Whether you are baking these for a quiet Sunday afternoon or as the base for a loaded masterpiece, you will find that the tender crumb and rich chocolate pockets provide a comfort that only a time-honored recipe can offer. It is a recipe that honors the past while giving you the freedom to create your own traditions.
The Foundation
You will love this recipe because it prioritizes the integrity of the cookie dough above all else. Many cookies fall flat or become greasy, but this dough is engineered to be thick, soft, and substantial. By using melted butter that has been properly cooled, we create a chewy texture that mimics the high-end treats you find in professional bakeries. It is a proven method that yields a dependable result every single time you preheat the oven.
Another reason this recipe is a keeper is the balance of flavors. We do not just rely on sugar; we use a higher ratio of brown sugar and a generous amount of vanilla to create a deep, almost toffee-like undertone. This depth of flavor makes the cookie delicious on its own, even before you hit a chocolate chip. It is the perfect starting point for any baker who wants to master the art of the classic cookie before moving on to more complex, loaded versions.
Print
Bakery Style Chocolate Chip Cookies 3
- Total Time: 3 hours 35 mins
- Yield: 12 cookies
- Diet: Vegetarian
Description
These decadent bakery-style cookies are engineered for a thick, soft, and substantial texture using a unique blend of flours and a patient chilling process. With a rich, toffee-like flavor and a mix of regular and mini chocolate chips, they deliver a professional-quality treat right from your home kitchen.
Ingredients
- All-purpose flour
- Cake flour
- Baking soda
- Salt
- Unsalted butter, melted and cooled
- Light brown sugar
- Granulated sugar
- Eggs
- Egg yolk
- Pure vanilla extract
- Semi-sweet chocolate chips (regular and mini blend)
Instructions
- Line a large baking sheet with parchment paper or a silicone mat and set aside.
- In a large mixing bowl, whisk together the all-purpose flour, cake flour, baking soda, and salt.
- In a separate bowl, stir together the cooled melted butter, light brown sugar, and granulated sugar until smooth.
- Add the room-temperature eggs, extra egg yolk, and vanilla extract to the butter mixture, mixing until glossy.
- Gradually incorporate the dry flour mixture into the wet ingredients, mixing until just combined.
- Gently fold in the semi-sweet chocolate chip blend until evenly distributed.
- Scoop 3-ounce balls of dough onto the prepared sheet, cover tightly, and refrigerate for at least 3 hours.
- Preheat your oven to 350°F (180°C) and prepare additional baking sheets with parchment paper.
- Place 5 to 6 chilled dough balls on each sheet and bake for 14 to 17 minutes until edges are golden.
- Let the cookies rest on the sheets for 15 minutes before transferring them to a wire rack to cool completely.
Notes
To ensure your cookies have that iconic soft center, be careful not to over-bake; they should look slightly underdone in the middle when pulled from the oven. If you don’t have cake flour on hand, you can make a substitute by removing two tablespoons of all-purpose flour from a cup and replacing it with two tablespoons of cornstarch.
- Prep Time: 20 mins
- Cook Time: 15 mins
- Category: Dessert
- Method: Baking
- Cuisine: American
The Dough Base

To create a cookie that feels truly professional, we have to look at the quality of our ingredients. Every item in this list serves a specific purpose in building our foundation. I always recommend using the best butter you can find, as the fat content and water balance will dictate the final spread and richness of your bake.
- All-Purpose Flour and Cake Flour: This blend is our secret weapon. All-purpose flour provides the structure, while cake flour, with its lower protein content, makes the crumb tender and soft.
- Unsalted Butter: We melt the butter to encourage a chewier texture, but cooling it for 15 to 20 minutes is vital to make sure it does not scramble our eggs or make the dough too oily.
- Light Brown Sugar and Granulated Sugar: The brown sugar brings moisture and a hint of molasses, while the granulated sugar helps get those slightly crisp, golden edges we all love.
- Eggs and Egg Yolk: The extra yolk is a small addition that makes a world of difference, adding richness and a fudgy consistency to the center of the cookie.
- Vanilla Extract: Always use pure vanilla if possible. It acts as the seasoning for our dough, making all the other flavors shine brighter.
- Chocolate Chip Blend: Using a mix of regular and mini chocolate chips means you get a different chocolate experience in every bite—some big melty pools and some fine speckles throughout.
The Classic Method
Step 1: Prep Your Space
Begin by lining a large baking sheet with parchment paper or a high-quality silicone baking mat. Having your station ready allows you to focus entirely on the dough. Set this aside while you gather your ingredients.
Step 2: Whisk the Dry Ingredients
In a large mixing bowl, whisk together your all-purpose flour, cake flour, baking soda, and salt. It is important to spoon and level your flour if you are not using a scale. This whisking step not only combines the ingredients but also aerates the flour, helping to prevent a heavy or dry cookie.
Step 3: Combine Butter and Sugars
In a separate large bowl, gently stir together the cooled melted butter, brown sugar, and granulated sugar. You do not need a heavy mixer for this—a simple wooden spoon or spatula works beautifully. Stir until the mixture is smooth and the sugars are well incorporated into the butter.
Step 4: Incorporate Eggs and Vanilla
Add your room-temperature eggs, the extra egg yolk, and the vanilla extract to the butter mixture. Mix these in gently until the dough looks glossy and uniform. Using room-temperature eggs helps the fats and liquids emulsify properly, which is a key part of a solid cookie foundation.
Step 5: Mix the Dough
Gradually add your dry flour mixture into the wet ingredients. Mix until just combined. Over-mixing at this stage can develop too much gluten, which leads to a tough cookie rather than a tender one. Stop as soon as you see no more streaks of white flour.
Step 6: Fold in Chocolate
Gently fold in your semi-sweet chocolate chips. By using both regular and mini chips, you make sure the chocolate is evenly distributed. This way, every single bite has a perfect ratio of dough to chocolate.
Step 7: Scoop and Chill
Measure out 3-ounce balls of dough, which is about 1/3 cup or a large ice cream scoop. Place them on your prepared sheet. Cover them tightly with plastic wrap and refrigerate for at least 3 hours. This chilling time is non-negotiable; it allows the flour to hydrate and the fats to firm up, preventing the cookies from spreading too thin in the oven.
Step 8: Preheat and Prep
When you are ready to bake, preheat your oven to 350°F (180°C). Prepare two or three more baking sheets with parchment paper. Take your chilled dough balls out and place only 5 or 6 on each sheet, as these bakery-style cookies need plenty of room to expand.
Step 9: Bake to Perfection
Bake for 14 to 17 minutes. You are looking for the edges to be a light golden brown and the tops to be set. They might look slightly underdone in the center, but they will finish cooking on the hot pan. This is the secret to a soft, gooey middle.
Step 10: Cool and Set
Allow the cookies to rest on the baking sheets for at least 15 minutes. This patience is rewarded with a cookie that holds together perfectly. Afterward, move them to a wire rack to cool completely before storing.
Dough Wisdom

To achieve that truly professional look, I recommend “scooting” your cookies. As soon as they come out of the oven, take a large circular cookie cutter or a bowl and gently swirl it around the hot cookie to tuck in any stray edges. This creates a perfectly round, thick shape. Also, remember that measuring by weight is the most reliable way to bake. If you find your cookies are spreading too much, it might be due to the butter being too warm when mixed or the dough not chilling long enough. For more foundational advice on thick cookies, you might enjoy reading about our bakery-style chocolate chip cookies. For another perspective on getting that perfect bakery finish, this guide from Live Well Bake Often offers wonderful insights into cookie textures.
Build On This Base
Once you have mastered this foundation, the possibilities are endless. You can try browning the butter before melting it to add a nutty, toasted flavor—just make sure to let it cool completely so it doesn’t change the dough’s chemistry. For those who love a bit of contrast, a sprinkle of flaky sea salt on top right after baking can transform the sweetness. If you find yourself in a rush and cannot wait for the chill time, you could try a no-chill chocolate chip cookies recipe, though the texture will be slightly different. This dough is also sturdy enough to handle heavy mix-ins like crushed walnuts or even chopped-up candy bars if you are feeling a bit wild.
Classic Enjoyment

There is nothing quite like a warm cookie straight from the oven, but these bakery-style treats are substantial enough to be served as a proper dessert. Pair them with a cold glass of whole milk or a warm cup of coffee to balance the richness of the chocolate. If you are hosting a gathering, you can stack them on a beautiful wooden board to showcase their impressive size. If you love the look of oversized, decadent treats, you might also be interested in this crumbl cookie recipe copycat which captures that same grand presentation. These cookies also make a wonderful gift when wrapped in simple parchment paper and tied with a bit of twine.
The Sweet Foundation
Baking is more than just following a list of instructions; it is about building something reliable and sharing that warmth with the people you love. When you start with a strong dough like these Bakery Style Chocolate Chip Cookies 3, you are creating a tradition that your family will treasure for years to come. I hope these cookies bring as much joy to your kitchen as they have to mine. For another variation on this classic treat, check out our bakery-style chocolate chip cookies 2. Happy baking, and remember that a good cookie always starts with a good heart.
Connect with us for more baking wisdom:
