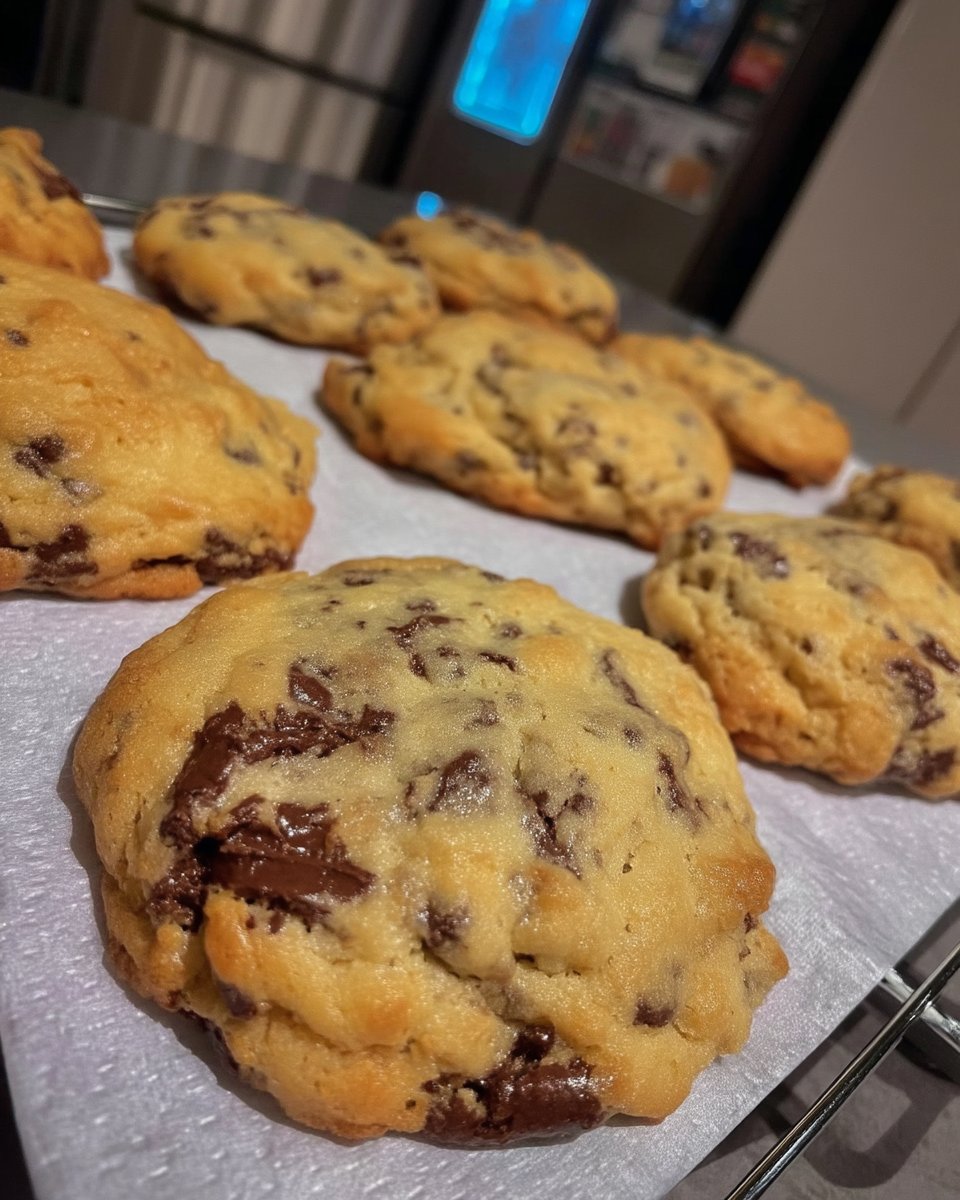
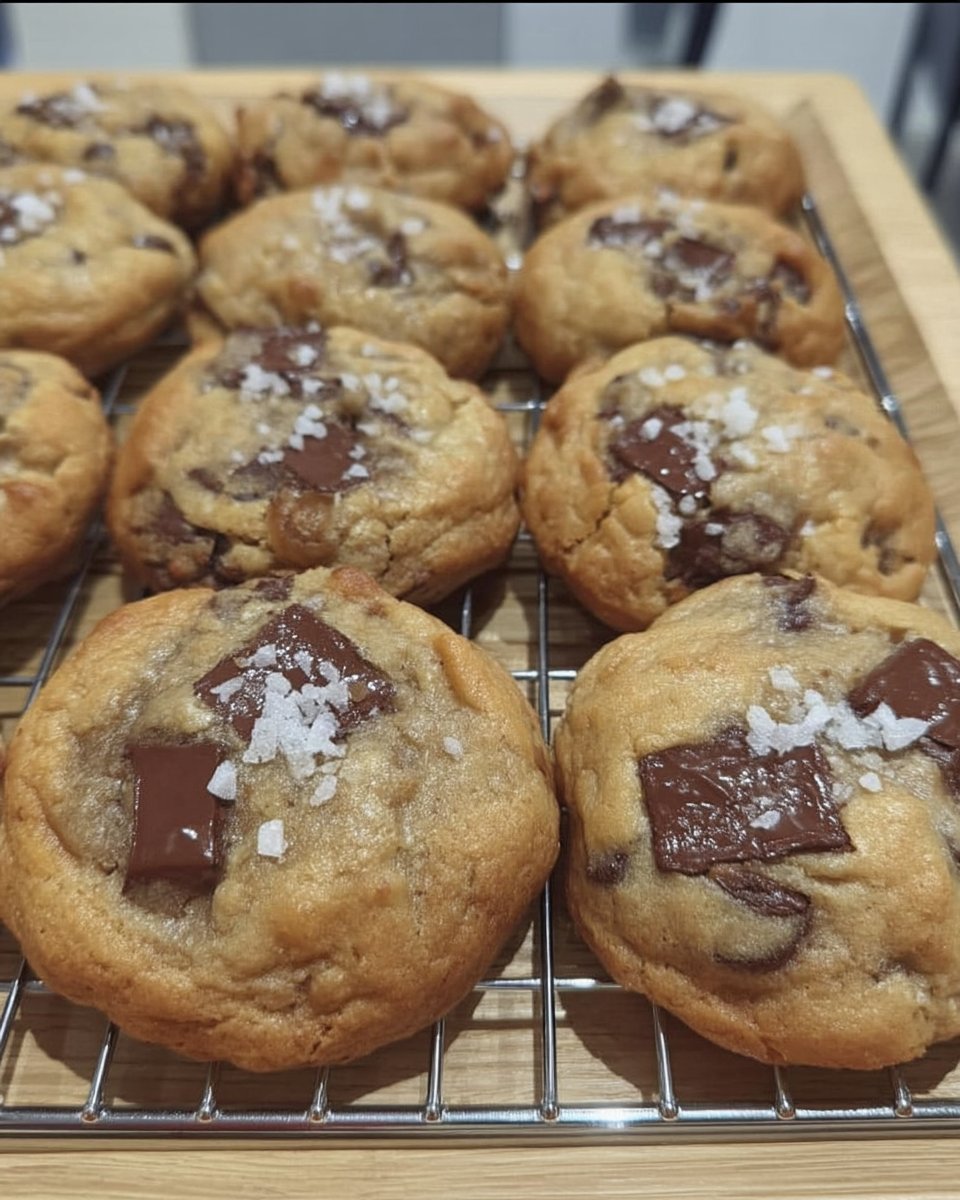
There is something undeniably comforting about walking past a bakery window and seeing those giant, thick cookies stacked high on a platter. I have spent years searching for the secret to that specific texture—the kind that stays soft in the center but offers a satisfying resistance at the edge. The truth I found is that you don’t need industrial equipment; you just need to treat your ingredients with a little extra care and patience.

This recipe is a testament to the power of a solid foundation. By using melted butter and a touch of cornstarch, we create a dough that is robust enough to hold plenty of chocolate without spreading into a wafer. It is a straightforward method that rewards you with the ultimate bakery experience right in your own kitchen, no mixer required.
The Foundation of a Perfect Cookie
You will love this recipe because it balances ease with exceptional results. There is no need to wait for butter to soften on the counter because we start by melting it, which also contributes to a denser, fudgier texture. The addition of cornstarch works quietly in the background to keep the centers tender for days.
Furthermore, this dough is incredibly forgiving. Once you master this base, you can trust it to perform every single time. It delivers that substantial, “sink your teeth into it” bite that thin, crispy cookies just can’t match. It is the perfect starting point for anyone wanting to up their baking game without complicated techniques.
Print
Bakery Style Chocolate Chip Cookies
- Total Time: 1 hour
- Yield: 8 cookies
- Diet: Vegetarian
Description
Recreate the magic of a professional bakery at home with these exceptionally thick and chewy chocolate chip cookies. By utilizing melted butter and a strategic chilling period, you can achieve a dense, fudgy texture and perfectly set edges every single time.
Ingredients
- 1 cup unsalted butter, melted and cooled
- 1 cup light brown sugar, packed
- 1/2 cup granulated sugar
- 1 large egg, room temperature
- 1 tablespoon vanilla extract
- 1 teaspoon cornstarch
- 1/2 teaspoon baking soda
- 1/2 teaspoon baking powder
- 1/2 teaspoon salt
- 2 1/4 cups all-purpose flour
- 2 cups semi-sweet or milk chocolate chips
Instructions
- Melt the butter in a microwave-safe bowl and set aside until it reaches room temperature.
- In a large mixing bowl, whisk together the cooled liquid butter, brown sugar, and granulated sugar until fully combined.
- Add the egg and vanilla extract, whisking briskly until the mixture appears smooth and glossy.
- Whisk in the cornstarch, baking soda, baking powder, and salt.
- Stir in the flour using a spatula or wooden spoon, mixing only until no more flour streaks are visible.
- Fold in the chocolate chips until evenly distributed.
- Divide the dough into 8 large portions, roughly 4 ounces each, and roll into balls.
- Place the dough balls in an airtight container and refrigerate for a minimum of 30 minutes.
- Preheat your oven to 325°F and line a large baking sheet with parchment paper.
- Bake 3 to 4 cookies at a time for 13–18 minutes, removing them when the edges are golden but the centers still look slightly soft.
- Let the cookies cool on the baking sheet for at least 10 minutes to allow them to firm up.
Notes
For the best results, ensure your egg is at room temperature so it emulsifies properly with the cooled butter. If your cookies appear slightly irregular in shape after baking, use a circular glass to gently rotate around the edges while they are still hot to create a perfect circle. These cookies are best stored in an airtight container for up to three days to maintain their soft, tender crumb.
- Prep Time: 15 mins
- Cook Time: 15 mins
- Category: Dessert
- Method: Baking
- Cuisine: American
Quality Ingredients Matter

To get that authentic bakery taste, we stick to the classics but use them intentionally. Here is what you need to gather before we begin:
- Unsalted Butter: We melt this and then let it cool. The cooling is vital—if it is too hot, it will cook your eggs and make the dough greasy.
- Sugars: A mix of light brown sugar for chewiness and moisture, and granulated sugar to help achieve those crisp edges.
- Egg: Use a large egg at room temperature to ensure the dough emulsifies smoothly.
- Vanilla Extract: A generous splash of real vanilla brings warmth to the dough.
- Cornstarch: The secret ingredient that keeps the cookies soft and thick rather than flat and crunchy.
- Leavening Agents: Both baking soda and baking powder are used to give the cookie lift and spread control.
- Flour: Standard all-purpose flour provides the structure. Be sure to measure it correctly so your cookies aren’t dry.
- Chocolate Chips: I prefer a mix of semi-sweet and milk chocolate chips, but feel free to use chunks for deeper pools of chocolate.
How to Build the Dough
Step 1: Melt and Cool the Butter
Start by melting the butter in a microwave-safe bowl. The most critical part of this step is patience: let the butter cool back down to room temperature. It should be liquid but not hot to the touch. This prevents the sugars from dissolving too quickly and the eggs from scrambling.
Step 2: Mix the Sugars and Wet Ingredients
Pour the cooled butter into a large mixing bowl. Add the brown and granulated sugars and whisk them together until combined. Add the egg and vanilla extract, whisking briskly until the mixture is smooth, glossy, and emulsified. This creates the structural backbone of your cookie.
Step 3: Combine Dry Ingredients
Whisk in the cornstarch, baking soda, baking powder, and salt directly into the wet mixture to ensure they are evenly distributed. Then, stir in the flour with a wooden spoon or spatula. Mix only until the flour streaks disappear—overworking the dough now leads to tough cookies later.
Step 4: Fold and Chill
Gently fold in the chocolate chips. Divide the dough into 8 large portions (about 4 ounces each) for that true bakery size. Place the dough balls in an airtight container and chill in the refrigerator for at least 30 minutes. This rest allows the flour to hydrate and the fat to firm up, preventing the cookies from spreading too thin.
Step 5: Bake Low and Slow
Preheat your oven to 325°F and line a large sheet pan with parchment paper or a silicone mat. Place 3 to 4 dough balls on the sheet, leaving plenty of room for them to spread. Bake for 13–18 minutes. You want them to look slightly underbaked in the center when you pull them out; they will finish setting on the hot pan as they cool.
Teresa’s Dough Wisdom

- Temperature is Everything: I cannot stress enough how important it is to let your melted butter cool. If you rush this, you will end up with a greasy puddle instead of a cookie. Similarly, do not skip the chilling step; it is the difference between a flat disc and a thick, bakery-style mound.
- Measure Flour Correctly: If you scoop your flour directly with the measuring cup, you pack it down and end up with too much. Spoon the flour into your cup and level it off with a knife for a tender crumb.
- The Scoot Method: If your cookies come out slightly misshapen, use a large round cookie cutter or a glass to gently “scoot” them into perfect circles immediately after taking them out of the oven while they are still hot and pliable.
- Undercooking is Key: These cookies are meant to be soft. Pull them when the edges are set but the centers still look a bit wet. They will firm up as they cool.
For more quick tips on getting the best results with minimal effort, take a look at our guide on Quick Cookie Solutions.
Build On This Base
Once you are comfortable with this foundational dough, you can let your creativity run wild. The sturdy nature of this base makes it perfect for heavy mix-ins.
- Nutty Crunch: Add a half cup of chopped walnuts or pecans for texture and a nutty flavor profile that cuts through the sweetness.
- Double Chocolate: Swap the milk chocolate chips for white chocolate chunks and dried cranberries for a festive twist.
- Stuffed Surprise: Flatten a dough ball, place a piece of caramel or a dab of peanut butter in the center, and seal the dough around it before chilling.
If you are looking for more ways to make your treats look as good as they taste, browse our Showstopper Cookie Designs. This recipe shares the robust, reliable nature of other favorites, much like the Bakery Style Chocolate Chip Cookies found on Chelsea’s Messy Apron, which also champion the melt-and-cool method.
Sharing the Love

There is no wrong way to eat a chocolate chip cookie, but they are arguably at their peak about 15 minutes after coming out of the oven. The chocolate is still melty, and the edges are crisp.
Serve these with a tall glass of cold milk to balance the rich, buttery sweetness. They also make an incredible base for ice cream sandwiches—just press a scoop of vanilla bean ice cream between two cooled cookies for a decadent treat. These are perfect for family gatherings or simply treating yourself after a long week. For more ideas on when to serve these, check out our Festive Cookie Moments.
The Sweet Foundation
Mastering this bakery-style chocolate chip cookie gives you a reliable classic that will never go out of style. It proves that with good ingredients and a little patience, you can create something truly special right at home. The foundation matters, and this dough provides the perfect canvas for your baking adventures.
I hope you enjoy baking these as much as I do. If you are looking for more tried-and-true recipes, be sure to visit our Ultimate Cookie Favorites. Don’t forget to share your creations with us on social media!
